Tree Trimming climbing gear
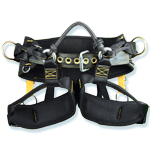 2. Harness
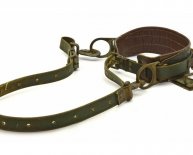
Also sometimes called a saddle. This is the piece worn by the climber around the hips and legs to provide a safe and comfortable way to connect to the flipline or climbing line.
3. Flipline
Also called a safety lanyard. This is the piece that goes around the tree or pole in front of the climber and connects to metal d-rings on both sides of the climber’s saddle. As the climber ascends, he/she flips this piece up the opposite side of the tree to keep it at the same height as his/her body. The flipline provides a safety link to the tree. A back-up flipline is useful for moving around branches without untying.
Ascender Also called a rope grab, this device was invented to make climbing rope easier, but has been adapted for use as flipline adjuster. It uses a cam to pinch the rope and hold it in place when under tension. When not under tension, the flipline can be easily adjusted with one hand. Safer for use around saws.
Prusik
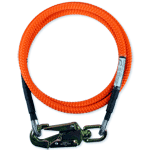 Like the ascender, the prusik was originally designed for climbing rope, but has been adapted for use as a flipline adjuster. Usually, this piece has a locking snap spliced onto a prusik loop, which is then tied onto the flipline using either a two- wrap/four coil or three-wrap/six coil prusik knot.
5. Carabiner
Used to attach the flipline adjuster to the saddle. The carabiner should be of the positive locking type, where three motions are required to unlock the carabiner, and the carabiner locks automatically when released.
How to Spur Climb
1. Pre-climb inspection: Before climbing the tree, it is essential to conduct a thorough inspection of the work site. The climber should be looking for anything that could pose a hazard to either himself or an accompanying ground person.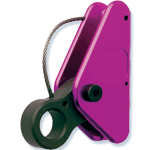 Examples include indications of rot or other structural defects in the tree, such as mushrooms near the base of the tree, conks or other fruiting bodies on the trunk, cracks or cavities in the tree, etc. In particular, the crown of the tree should be carefully inspected from the ground for hangers, dead branches, and stinging insects. Once in the tree, the climber is already committed and may be unable to get back down safely if things don’t go as planned. It is absolutely necessary for the climber to have a plan for the entire job from start to finish.
2. Ascending: Once the pre-climb inspection has been completed, the climber can then strap on the spurs, saddle, and other climbing equipment and begin climbing. Start by throwing one end of the flipline around the tree and catching it in the other hand. Connect this to the positioning d- ring on the opposite side of the saddle from the adjuster.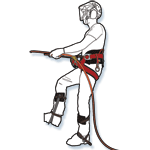 Using the spurs to gain purchase on the trunk and the flipline to keep from falling backwards away from the tree, stab the gaff of the spur into the tree and step up onto it. It is important to make sure that the gaff goes in at the correct angle with the knee 6 to 8 inches away from the trunk. If this is not done properly, the gaff will tear out of the trunk as soon as weight is placed on it. Every 2 or 3 steps up, the flipline should be advanced up the trunk to keep pace with the climber by releasing the tension on it and flipping it up. As the climber ascends, he/she will encounter branches along the way. These can be either cut off to allow passage of the flipline and climber or bypassed with an alternate flipline. Small stubs and twiggy branches can often be passed over with a good flip. As the climber ascends and the trunk becomes smaller in diameter, the flipline should be shortened using the adjuster to keep the climber’s torso the right distance from the trunk.

