Build your Own Rock climbing Wall
 Even those of us with easy access to quality boulders and crags often find ourselves wanting an indoor space.
Sometime weather shuts us down, and sometimes we just want to train in a more structured way than we typically can on granite or limestone. Even if you have a climbing gym nearby, nothing beats a home climbing wall when it comes to getting strong. No crowds, no kids’ birthday parties, no membership fees—just you and the woody and a desire to be bone-crushingly strong when spring hits.
You can build a woody just about anywhere. Back in the day I built a free-standing wall on the tiny porch hanging off of my tiny apartment. Several years later I built a wall in the corner of my garage. My most recent experiment, however, proved to be the best option. First you need a girlfriend with an unfinished room in the basement of her house. Why the girlfriend, and why the basement? It’s a lot cheaper to split the material cost with someone else, and the basement is more comfortable than the garage.
Plan
Now that you have a location, you need a plan. The easiest, and generally best, plan is to build a 45-degree overhanging wall that’s 8 feet wide and runs floor to ceiling. This is steep enough to give you a good pump, gives you enough area to set some real problems, and keeps the math nice and simple.
 Tools
Tools
You don’t need to be a master carpenter, but you do need a few basic tools:
Hammer
Drill
Tape measure
Circular saw
Miter saw
Level
Chalk line
Safety glasses
Materials
Materials will change based on the size of your wall. This is the list for a basic 45-degree, 8-foot-wide wall.
12 – Joist hangers
3 – 10-foot 2×6 boards
2 – 8-foot 2×6 boards
2 – 8-foot 2×4 boards
3 – 4×8-foot ACX plywood, 3/4in thick
1 Box 3.5-inch screws
1 Box 2-inch screws
1 Box 16d nails
~225 – 3/8-inch T-nuts
Build
Now that you have everything together and know where your wall will go, it’s time to build. This may look like a lot of steps, but it’s really pretty straightforward. If you can run a saw without losing a finger, count in increments of eight, and swing a hammer, then you can do this.
Step 1 – Installing Header Joists
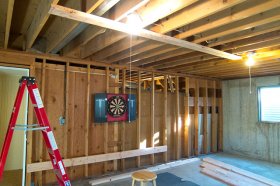
 Start by screwing header joists (8ft 2×6 boards) to the wall and ceiling. These will mark the bottom and top of your wall. Screw the bottom one in place about a foot above the ground. Measure from the top edge of the bottom board to the ceiling, and then measure out that same distance from the wall across the ceiling. That mark will be the inside edge of your top header joist.
Shown above are the top and bottom header joists installed.
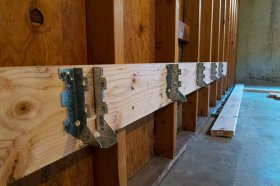
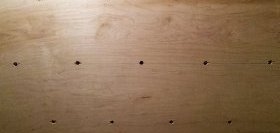
Step 2 – Installing Joist Hangers
Place your first joist hanger at the end edge of the bottom board, and hang another every 16 inches until you reach the other end.
With the joist hangers installed, you’re ready to prepare your joists for installation.
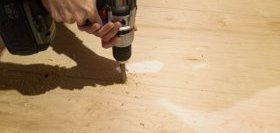
Step 3 – Preparing the Joists
Measure from the top edge of the bottom header joist to the wall-side edge of the top header joist (in a straight line). This will be the length of the inside edge of your joists (10ft 2×6 boards). Mark the inside edge of your board, and make a 45-degree cut across the broad side of the board—this cut will allow the board to sit in the joist hanger. After your initial cut, measure along the edge of the cut 5.5 inches from your initial mark, and make another mark. Flip your board over and, starting from the second mark, make a cut perpendicular to the first one—this cut will make your joists flush with the edges of your header joists. Repeat these cuts on the other end, making sure your first cut on that end starts on the same edge of the board, and then do it all again with the remainder of your boards.
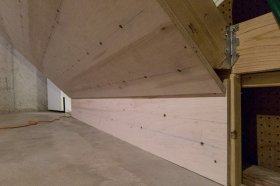
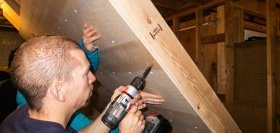
Step 4 – Assembling the Frame
Place one end of your joist in the bottom joist hanger, and get a friend to hold it up so the other end is flush against the header joist on the ceiling. Now use a joist hanger to secure the top of the board. Mark your top header joist every 16 inches and repeat the process until all the joists are in place. Your frame is finished.
With all of the joists installed, your frame is now complete, as shown above.
Step 5 – Building the Kick-Board Frame
Cut some 2x4s short enough to fit vertically underneath your bottom header joist. Start at one end of the header joist and screw a vertical board to each of the studs you find until you’re at the other end. This will be the frame for your kick board.

Share this article
Related Posts


Latest Posts


